Infrared Photography
.jpg)
Photographing light in the infrared end of the spectrum can produce some striking and beautiful images and it's something that you can have a go at quite easily.
Equipment
The method I use for infrared (IR) photography requires the following:
1 – A digital camera capable of detecting light at infrared wavelengths*
2 – A tripod (For those long exposures)
3 – Infrared filter (I use a Hoya R72) check eBay, expect to pay between £15 - £30
*See the following web page for a list of various cameras to check if yours will work:
http://www.jr-worldwi.de/photo/index.html?ir_comparisons.html
Locations
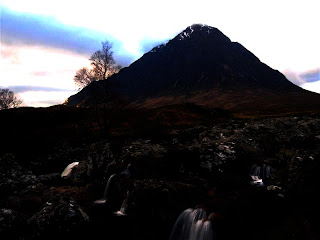
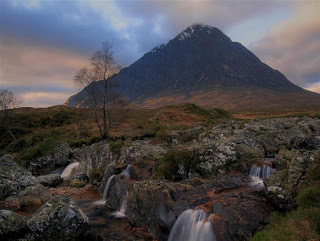
Infrared photography relies on reflected IR light; it therefore works best on sunny days. I try to photograph with the sun behind me illuminating what’s in front of the camera. For me, the draw of IR is the white glow it gives to green foliage so I like to photograph trees and other plants. Skies and water are reproduced dark and buildings take on a ‘greyish’ tone. Anywhere that buildings and foliage/water/sky come together should produce interesting results. Clear blue skies with a few clouds look the best as too many clouds can wash out your image. Locations to consider include graveyards, castles and forests.
Exposure
The IR filter blocks too much of the visible light spectrum for your camera to automatically set the WB. If your camera has a ‘one touch white balance’ setting, make sure to use it. Take a WB reading from a patch of grass in direct sunlight (with the IR filter attached) this lets the camera correctly balance the colour of your shot.
You’re going to need to use quite long exposures to get your picture which is why you’ll need a tripod. Depending on my location I’ll use between 2 seconds to 15 seconds. I also prefer to use as long a depth of field as possible so with a small aperture that’s going to increase the shutter speed needed. Experiment to find out what works best for your location.
Focus
Focus can be tricky in IR but with the R72 filter, I find that just enough visible light is allowed through for the auto focus to cope. Using your LCD display becomes difficult in IR so you’ll have to rely on your viewfinder for composition and trial and error to achieve the correct focus. Experiment, experiment, experiment.
Post processing
I process all my IR shots in Photoshop. Curves, auto levels and channel mixer are my tools of choice. In the channel mixer, with ‘red’ in the drop down menu, set the red slider to ‘ZERO’ and the blue slider to ‘100’. Now with ‘blue’ in the drop down menu, set the red slider to ‘100’ and the blue slider to ‘ZERO’. This swaps the red and blue channels.
Fiddle with these setting to your hearts content to find results pleasing to you.

Further things to try
You can now buy cameras that have been specially modified to take infared photos. These cameras allow shorter shutter speeds and smaller apertures and can produce incredibly sharp images. Such cameras are unable to take visible light photos properly though so you have to be sure you can justify the expense to take purely IR images.
I welcome any questions and discussion.
.JPG)
.JPG)
+(Medium).jpg)

.JPG)