Showing posts with label guide. Show all posts

Friday, March 09, 2007

Smoking is cool
-statement not endorsed by the creator of this blog-

If you've ever wondered what my user icon is all about, then wonder no more as I am about to reveal all.
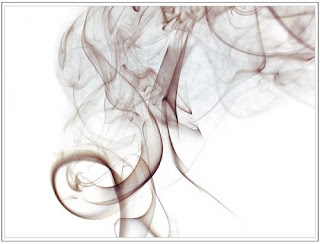

This is a photograph of smoke from an insense stick captured at high speed and if you'd like to have a go at this yourself then I have some tips that should help you on your way.

Ingredients

Insense sticks - Available cheap from lots of places, new age shops and the like.

Plant foam / Oasis - I stuck the insense stick into some plant foam to hold it, but there are other ways such as jam jars candle holders....anything.

Black card - Black, not white card to use as a backing for our shot. Local art and craft stores should help you out here.

Camera with flash.

Matches

Set up

I set up my backing card against a chair back and the plant foam infront of it with the insense stick in place. Mind you don't burn yourself or set anything you hold dear alight when you ignite your insense stick. They burn quite slowly so there should be time to get off loads of shots.

In the camera

I set my camera on a tripod and focused at a point just above the burning tip of the stick. As the smoke is always moving and we want to freeze the action, a fast shutter speed is necessary, 1/250 of a second or faster is ideal. We want to achieve crisp lines in the smoke as much as possible so a large depth of field is necessary. The pain here is that a large D.O.F requires a small aperture which means we need LOTS of light. I was able to work around this using the built-in fash but if you've got the means, studio lighting will give you all the illumination you need. You should play around with these settings to find ones that work for you and aim to get the background as dark as possible.

Post processing

Once you're thoroughly sick of wafting smoke about it's time to go to
Photoshop with the three or hopefully more nice smoke shapes you've captured. Open the levels adjustment window (Image>Adjustments>Levels) and move the black slider on the left towards the right until the black background is as black as possible without losing too much of the smoke. Next we need to invert the image (Image>Adjustments>Invert) This gives us a pure white background and a nice crisp dark wisp of smoke. At this point it might be necessary to clone out any unsightly grainy bits in the background using the clone stamp tool. If you want to add some colour to the smoke it can be done easily using the Hue/Saturation tool (Image>Adjustments>Hue/Saturation)
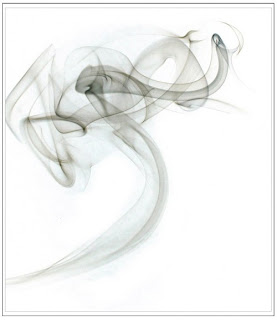

As usual, I welcome any questions.


Wednesday, February 28, 2007

High Dynamic Range

I'm going to start this blog with one of the most recent things I've been having fun with... HDR. That is, High Dynamic Range imaging. I'm going to approach this from the point of view that most readers have either never heard about HDR or haven't had much luck with it in the past. If you fall into the former category, to put it simply, an HDR image helps us obtain evenly exposed photographs. I'm no expert but the following will outline what I've learned.

Step 1 - You're goin to need at least two differently exposed images from your digital camera one for the higlights and one for the shadows. A midtone shot would be nice but the example I'm going to look at uses only one.

Step 2 - You'll need some imaging software capable of HDR processing. I use Photomatix Pro but Adobe Photoshop CS2 is perfectly acceptable too.

Step 3 - A willingness to experiment and tinker with settings is a must for this operation :)

Ok so to start off, select your two images. I'm using two shots taken in Glencoe, Scotland.
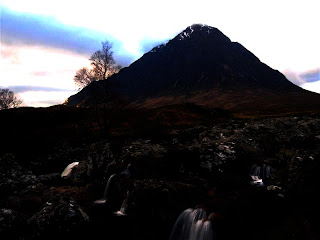
This shot is clearly over exposed as we have lost all the sky detail and the top of the mountain is even affected. The rocks in the foreground however are clear and detailed.

In this shot I have used a slower shutter speed to get that lovely sky nicely
exposed but at the cost sacrificing detail in the foreground.


We need to combine these in Photomatix. This is easiy done by dragging the files into the Photomatix workspace or opening them from within the program itself an then selcting HDR>Generate. Untill recently, I had stopped at this step because it produces the following rather unpleasing result:

Not very nice. We've now lost nearly all of the foreground to ugly darknes and have some horrible banding in the sky. On top of that we're now encouraged to give up. But wait! The next step makes all the difference.

Select HDR>Tone mapping to open a whole lot of new options. The problem with HDR is that it contains far too much information for our monitors to display. Tone mapping helps to regulate what information is shown. Have a play around with the new options to find something that pleases you. It will vary from photo to photo so don't be scared to change things till you get an image you like.


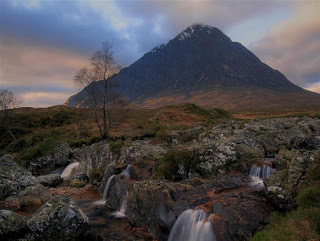
Fiddling around with the Tone mapping options has given us a nice lovely sky and crisp clear foreground. A lot of HDR images that I've seen tend to over do the effect and create a false looking 'posterised' look. If you're aiming for that look it's not a problem but I prefer the image to look natural.

If there are any questions please ask :)


-Dave-