I'm going to start this blog with one of the most recent things I've been having fun with... HDR. That is, High Dynamic Range imaging. I'm going to approach this from the point of view that most readers have either never heard about HDR or haven't had much luck with it in the past. If you fall into the former category, to put it simply, an HDR image helps us obtain evenly exposed photographs. I'm no expert but the following will outline what I've learned.
Step 1 - You're goin to need at least two differently exposed images from your digital camera one for the higlights and one for the shadows. A midtone shot would be nice but the example I'm going to look at uses only one.
Step 2 - You'll need some imaging software capable of HDR processing. I use Photomatix Pro but Adobe Photoshop CS2 is perfectly acceptable too.
Step 3 - A willingness to experiment and tinker with settings is a must for this operation :)
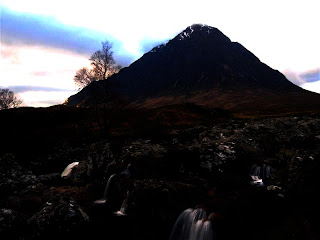
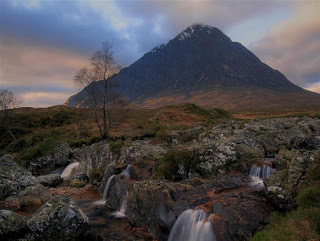
Ok so to start off, select your two images. I'm using two shots taken in Glencoe, Scotland.
.JPG)
.JPG)
In this shot I have used a slower shutter speed to get that lovely sky nicely
exposed but at the cost sacrificing detail in the foreground.
We need to combine these in Photomatix. This is easiy done by dragging the files into the Photomatix workspace or opening them from within the program itself an then selcting HDR>Generate. Untill recently, I had stopped at this step because it produces the following rather unpleasing result:
Not very nice. We've now lost nearly all of the foreground to ugly darknes and have some horrible banding in the sky. On top of that we're now encouraged to give up. But wait! The next step makes all the difference.
Select HDR>Tone mapping to open a whole lot of new options. The problem with HDR is that it contains far too much information for our monitors to display. Tone mapping helps to regulate what information is shown. Have a play around with the new options to find something that pleases you. It will vary from photo to photo so don't be scared to change things till you get an image you like.
+(Medium).jpg)
If there are any questions please ask :)
-Dave-

.JPG)
No comments:
Post a Comment